DIY How To Do T-Shirt Printing-Introduction: Customizing your own t-shirts with unique designs is a fun and creative way to express yourself. In this tutorial, we’ll explore how to create DIY custom t-shirt prints using simple techniques that anyone can master. Whether you’re making shirts for yourself, as gifts, or for a special event, this tutorial will guide you through the process step by step.
Materials Needed:
- Plain T-Shirt (cotton or blend)
- Fabric Paint or Screen Printing Ink
- Stencils or Freezer Paper
- Foam Brushes or Screen Printing Squeegee
- Cardboard or Plastic Sheet (to insert inside the shirt)
- Iron (if using freezer paper stencils)
- Painter’s Tape (if using stencils)
- Design Template or Drawing
- Cutting Mat and Craft Knife (if making your own stencils)
- Protective Gloves and Apron (optional)
Step-by-Step Tutorial:
- Choose Your Design:
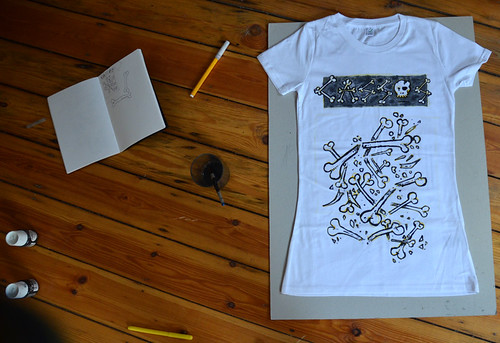
- Start by selecting or creating the design you want to print on your t-shirt. This could be a simple graphic, text, or intricate pattern. Make sure the design fits the size and shape of your shirt.
- Prepare Your Shirt:
- Lay your plain t-shirt on a flat surface and insert a piece of cardboard or plastic sheet inside to prevent the paint from bleeding through to the other side. Smooth out any wrinkles or creases in the fabric.
- Create Your Stencil:
- If using stencils, trace or transfer your design onto freezer paper and carefully cut it out using a craft knife on a cutting mat. Make sure to leave any necessary bridges or connections in the stencil to hold the design together.
- Position Your Stencil:
- Place your stencil onto the front of the shirt in the desired location. Use painter’s tape to secure the edges and prevent any paint from seeping under the stencil.
- Apply the Paint:
- Using a foam brush or screen printing squeegee, apply a thin layer of fabric paint or screen printing ink over the stencil. Work the paint into the fabric evenly, making sure to cover the entire design.
- Remove the Stencil:
- Carefully peel away the stencil while the paint is still wet to reveal your custom design underneath. If using freezer paper stencils, you can also use an iron to heat-set the paint for a more permanent finish.
- Let It Dry:
- Allow your freshly printed t-shirt to dry completely before wearing or washing it. Follow the instructions on the paint or ink packaging for recommended drying times.
- Cure the Print (Optional):
- To ensure the longevity of your custom print, consider heat-curing it with an iron or heat press according to the manufacturer’s instructions. This will help set the paint into the fabric for a more durable finish.
- Clean Up:
- Clean your brushes, stencils, and work surface thoroughly with soap and water to remove any paint residue. Store your supplies in a safe place for future use.
- Enjoy Your Custom Creation:
- Once your t-shirt is dry and cured, proudly wear your custom creation and show off your unique style to the world!


